MY MINIONS

Halloween is Almost Here
Showing posts with label easy peezy. Show all posts

Thursday, January 3, 2013

Chalk And Magnet Boards - Easy Peezy Pumpkin Squeezy


Okay, I have been hounding David for a chalkboard for the kitchen with cork board right next to it. I didn't know that Benjamin Moore makes a chalkboard paint until just now. I found the ideas on http://style-files.com/2008/09/02/blackboard-walls/ . It's so freaking cool! Go check out the ideas on this site. You can paint a whole wall, a door, or just a small area and then frame it.

Word to the wise: Those so called magnetic paints that are out on the market are a waste of time and money. They don't work worth a damn no matter how many layers you paint on that wall. 

**A great idea would be to buy a piece of galvanized panning from Home Depote. Cut it to the size you want and frame it with a flat picture frame. You can even paint it with the chalkboard paint and have a magnetic chalkboard for the kitchen or the kid's room.

**Or go to Walmart if you dare, and get a roll of magnetic vinyl. Cut it to size for what you want and then paint it with the chalkboard paint. I put like 4 coats on mine. It fits the door of my refrigerator just right. Cool place for grocery notes and such.

Monday, July 9, 2012

Jeweled Toned Glass Made Easy Peezy Pumpkin Squeezy


I found this great idea for painting those pretty clear glass jars or bottles and giving them that jeweled tone look. It's easy peezy with Mod Podge and food coloring. I found this great idea on http://carolynshomework.blogspot.com/2011/07/etceteras-cranberry-glass.html.
This woman is amazing. You need to go check out her site.

Tuesday, June 26, 2012

I Have to Show Y'all My Sun Catchers I Made

A while back I posted an Easy Peezy Sun Catcher crafty idea for summer. Go ahead, take a quickie look see. That sucker has taken more than 320 hits so far. Well there are a few things I want to fix on that rascal before I show you my sun catchers that I made this past weekend.

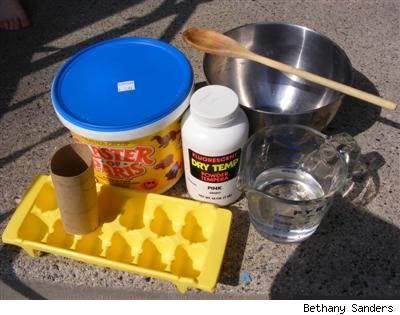
#1. When you figure out what type of shapes you want, make sure it's made of either Teflon or any metal that your bakeware comes in. I want to make this clear so y'all don't go using any of that high temperature rubber stuff as a mold. Also use pans with unique shapes. I used my two pineapple upside down cake molds for the tiny suns and flowers hanging from the two bigger heart and round shaped cake molds. It looked cool. Also please make sure you use beads that are clear. Solid colored beads don't cut it. Also you can use any shape beads together; just as long as they are nearly the same size for melting. Bigger round beads take a heck of a lot longer to melt down flat.

#2. You do NOT need to spray with Pam or put any kind of layer of grease in the pan. We are dealing with plastic beads here. These little things will not stick to the metal pans.

#3. DO NOT  put the pans in cool water to cool them off faster.  The plastic that has melted will curl and it wont be pretty. Just take the pans out of the oven when the plastic is fully melted flat and place the pans either on a marble counter top or a pot holder. The plastic will start to shrink in the pan and it's fun to watch. The plastic will pop out on it's own. If you have long wooden skewers use them to get any molded plastic out that might be stuck because of an air bubble. Don't use metal skewers because it will mess up your pans and scratch the  plastic.

#4. I know I said to use a single layer of plastic beads in the pans but that was because the recipe called for it. Put a shit load in there. At least 2 to 3 layers of beads. It makes for a sturdier sun catcher that won't break so easily when or if bad weather knocks it down outside. You will have to leave the pans in longer but if you start them on the top part of the oven while another bunch is finishing up on the bottom part of the oven, it saves time. Also you DO have to eyeball this stuff. Don't even bother to time it cause beads 3 layers thick are going to take longer.

#5. I will stress this more than anything in the world ... MAKE THIS STUFF IN THE WINTER WHEN IT'S COLD !!!!! I liked to have died of the heat from sitting in the kitchen. No amount of cool air from an air conditioner is going to keep you from passing out. I had to go lay down on the couch in the cool living room just to finish this shit. The smell of melting plastic is also dangerous so really, when I say open your windows in the kitchen; YOU BETTER DAMNED WELL OPEN THEM OR DIE!!!

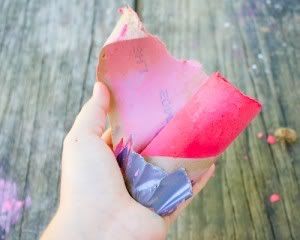
Now for the pictures of my two sun catchers I made this weekend. You will see little air bubbles in them, that's natural. Some of  the pictures are a little blurry because the breeze was blowing them. But they turned out really nice. David was impressed too.


Thursday, June 14, 2012

Thursday, June 7, 2012

Sidewalk Chalk Made Easy Peezy Pumpkin Sqeezy

I found this great idea that grown-ups can make for their kids this summer. The recipe is very simple. I found it over at http://theladybugsgarden-stephanie.blogspot.com/2011/10/sidewalk-chalk-one-of-our-favorite.html . I love this blog because she has a few great ideas.


What you will need:
•    Toilet paper or paper towel tubes
•    Scissors
•    Duct tape
•    Wax paper
•    Small bucket or disposable container to make the recipe
•    ¾ cup of warm water
•    1 ½ cups Plaster of Paris
•    2-3 tablespoons of tempera paint
•    Paper bag or a “mess mat”
** we made six tubes of chalk – we simply doubled the above recipe.**

Step 1: If you are using paper towel tubes, cut each tube in half, so it is roughly the length of a toilet paper roll tube.
Step 2: Cover one end of each tube with duct table to hold the contents within.
Step 3: Cut as many pieces of wax paper as you have tubes. Roughly 6 inches X 6 inches. Roll the wax paper loosely and insert into the tubes so as to effectively line the tubes. The top of the wax paper will be higher than the tubes. The wax paper liner will keep the chalk mixture from sticking to the cardboard tubes and will eventually be peeled off.
Step 4: Pour the warm water into your bucket. Sprinkle the Plaster of Paris over the water and stir the mixture with a plastic spoon. The Plaster of Paris roughly starts hardening within 20-30 minutes, so you need to work fast so that it does not harden too quickly.

Step 5: Next you will want to pour the tempera paint into the Plaster of Paris mixture and stir so that it is mixed thoroughly. If you would like brighter colors  add more tempera paint into the mixture. We wanted to make a variety of colors of chalk, so we spooned about 1/2-3/4 cup of Plaster of Paris in each separate container and mixed in the different tempera paint colors into each bowl. We ended up making six different colors and next time might mix more.

Step 6: Stand each tube with the tape side down on a cookie sheet/flat baking dish/box lid to make the project easier to transport to a drying location.  Pour or spoon the colored Plaster of Paris mixture into the wax paper lined tubes. Lightly tap the sides of the tubes to release the air bubbles (so you do not have holes in your chalk). After you have poured the mixture into the tubes start another color. When done trim the excess wax paper so that it is closer to the cardboard tube.


Step 7: It took 3 days for our chalk to dry. On the last day, we peeled off the duct tape so that the underside could dry. When the chalk dries, peel off the paper tubes and wax paper. Your chalk is ready!

Related Posts Plugin for WordPress, Blogger...