

• Toilet paper or paper towel tubes
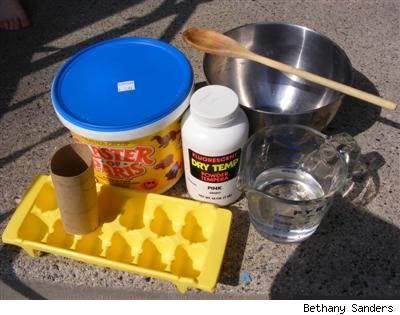 • Scissors
• Duct tape
• Wax paper
• Small bucket or disposable container to make the recipe
• ¾ cup of warm water
• 1 ½ cups Plaster of Paris
• 2-3 tablespoons of tempera paint
• Paper bag or a “mess mat”
** we made six tubes of chalk – we simply doubled the above recipe.**
Step 1: If you are using paper towel tubes, cut each tube in half, so it is roughly the length of a toilet paper roll tube.

Step 3: Cut as many pieces of wax paper as you have tubes. Roughly 6 inches X 6 inches. Roll the wax paper loosely and insert into the tubes so as to effectively line the tubes. The top of the wax paper will be higher than the tubes. The wax paper liner will keep the chalk mixture from sticking to the cardboard tubes and will eventually be peeled off.

Step 5: Next you will want to pour the tempera paint into the Plaster of Paris mixture and stir so that it is mixed thoroughly. If you would like brighter colors add more tempera paint into the mixture. We wanted to make a variety of colors of chalk, so we spooned about 1/2-3/4 cup of Plaster of Paris in each separate container and mixed in the different tempera paint colors into each bowl. We ended up making six different colors and next time might mix more.
Step 6: Stand each tube with the tape side down on a cookie sheet/flat baking dish/box lid to make the project easier to transport to a drying location. Pour or spoon the colored Plaster of Paris mixture into the wax paper lined tubes. Lightly tap the sides of the tubes to release the air bubbles (so you do not have holes in your chalk). After you have poured the mixture into the tubes start another color. When done trim the excess wax paper so that it is closer to the cardboard tube.
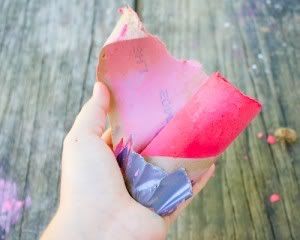
Step 7: It took 3 days for our chalk to dry. On the last day, we peeled off the duct tape so that the underside could dry. When the chalk dries, peel off the paper tubes and wax paper. Your chalk is ready!


No comments:
Post a Comment